The Xoom Console user interface has the following controls.
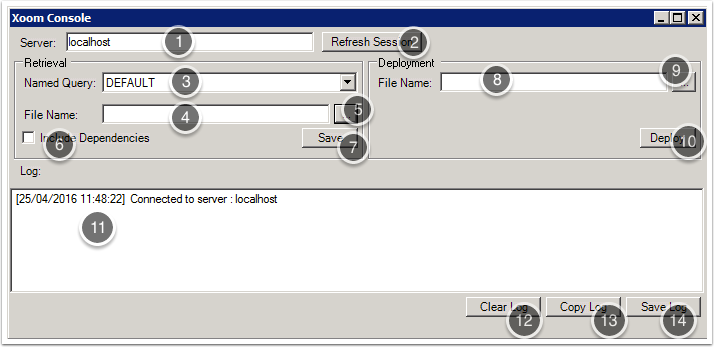
- Server: type the name of the Xoom server you want to connect to, typically localhost.
- The Connect/Refresh button connects the tool to the Xoom Xoom server, creates a session there, populates a list of named queries (3), and enables the Save (7) and Deploy (10) buttons.
- Named Query: select a named query from this list.
- File Name: type the file name and path to which the retrieved XoomXML will be saved.
- Alternatively, click on the browse button '…' to open a standard Save dialog.
- Include Dependencies: select this check box to include dependencies in the retrieval.
- Save: click to save configuration as a XoomXML file.
- File Name: type the name and path of the XoomXML file to be deployed.
- Alternatively, click the browse button '…' to open a standard Open dialog.
- Deploy: click to deploy the file.
- The Log Pane reports all the actions that have been performed and any errors that have been identified. All entries in the log are time-stamped.
- Clear Log: click to empty the log.
- Copy Log: copy the log to the clipboard.
- Save Log: opens a standard Save dialog from which you can save the log for future reference.