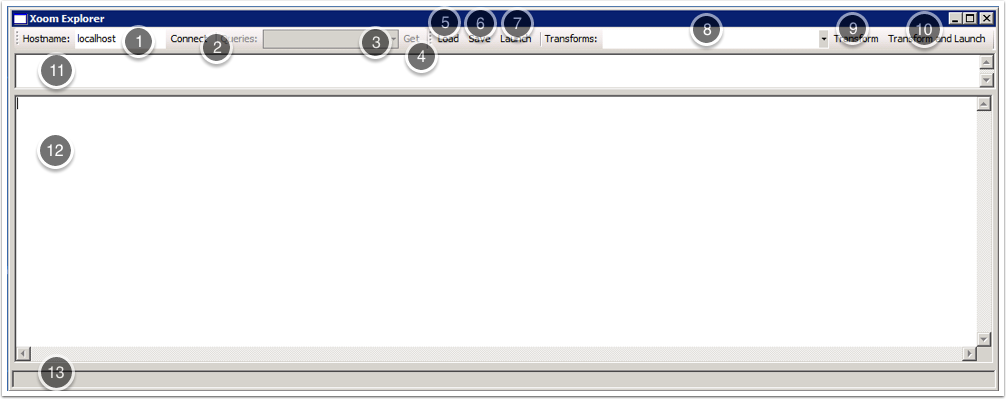
Xoom Explorer has the following user interface.
- 1
- Hostname textbox. Enter the hostname of the Xoom server you wish to connect to, for example localhost.
- 2
- Connect button. Click to connect to the specified Xoom server and load the available named queries.
- 3
- The Queries drop-down list, from which to select a named query.
- 4
- Get button. Click to retrieve data from the Xoom server using the selected query.
- 5
- Load button. Click to load a XoomXML file into Xoom Explorer via a standard dialog box.
- 6
- Save button. Click to save the contents of the Results pane (12). A standard Save dialog opens.
- 7
- Launch button. Click to save the contents of the Results pane (12) into a temp folder in the Xoom folder (typically here: C:\Program Files (x86)\Zany Ants\Xoom ), and open the resulting file with the default application. Before saving, the tool automatically detects whether the file is a generic XML file or an XHTML file and hence whether it should be opened using an XML viewer or a web browser.
- 8
- Transforms drop-down list. Make a selection from the available reports and transformations.
- 9
- Transform button. Click to execute the selected report or transformations. The Results pane (12) will be overwritten with the results.
- 10
- Transform and Launch button. Combines the functions of the Transform (9) and Launch (7) buttons.
- 11
- XPath box. Enter XPath queries to explore whatever configuration you have retrieved or loaded into Xoom Explorer.
- 12
- Results pane. Configuration that has been loaded, retrieved or transformed appears here.
- 13
- Status bar. Reports on progress of any actions, and the number of any results following an XPath query.